In modern manufacturing, machining performance depends on more than cutting speed or expensive equipment. A reliable workflow connects planning, programming, setup, machining, inspection, and maintenance. When one stage fails, the effects appear quickly. A missed tool change can leave a rough surface, delay inspection, and keep the next machine idle. This guide examines how to optimize machining workflow in manufacturing through practical decisions that shop teams can measure and improve.
The seven tips focus on real production conditions. They include reviewing setup sheets, standardizing tooling, monitoring cycle times, and using inspection data effectively. Clear work instructions help operators avoid repeated adjustments. Proper tool-life tracking can reduce unexpected failures. Even simple actions, such as labeling gauges beside the machine, can save valuable minutes. Small details matter.
However, no process works perfectly in every workshop. A method that succeeds on aluminum may perform poorly on hardened steel. Production volume, machine age, operator experience, and tolerance requirements all change the result. Therefore, each recommendation should be tested against actual jobs, not copied blindly. Record the baseline, make one controlled change, and review the evidence. That approach feels slower at first. It builds trust over time. Experienced engineers should also question data that looks unusually positive, because incomplete records can hide scrap, rework, or operator fatigue. The goal is not a flawless process. It is a safer, clearer, and more repeatable workflow that steadily improves delivery, quality, and machine utilization.
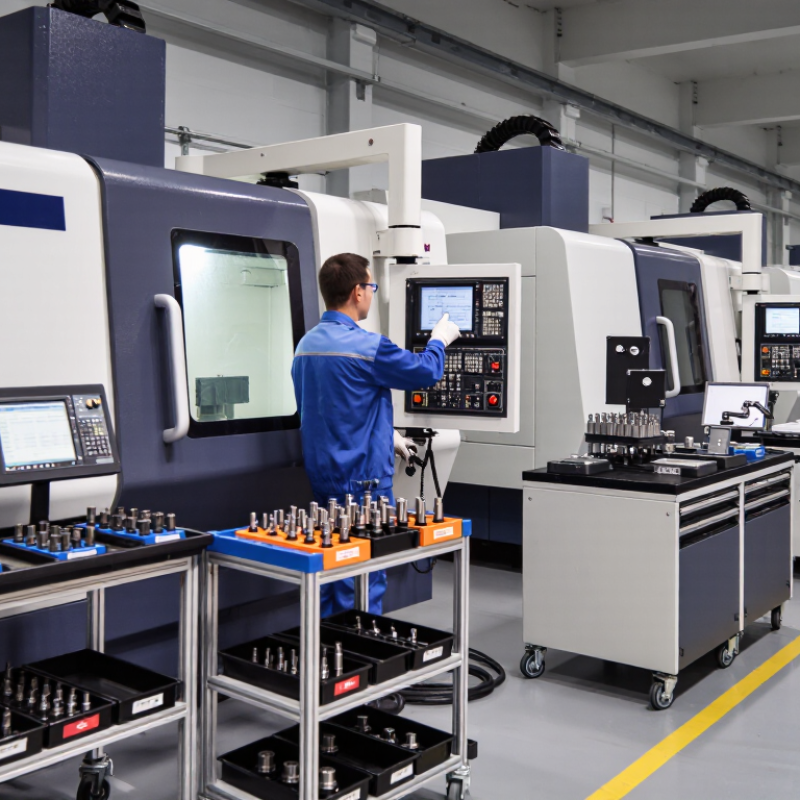
Assess the Current Machining Workflow and Identify Process Gaps
A machining workflow can look efficient while hiding costly delays. Assess it at the machine, not only in the planning office. Walk one job from drawing release to final inspection. Record setup time, cutting time, tool changes, waiting, rework, and material movement.
A simple timestamp sheet often reveals more than a polished dashboard. It is not glamorous. It works.
Compare planned cycle time with actual machine data for several similar parts. One unusually fast run can distort the baseline. Check whether operators pause for unclear dimensions, missing tools, or inspection decisions.
Measure queue time between operations, especially before heat treatment or finishing. These gaps often exceed cutting time. That finding can feel uncomfortable. It is useful.
Map each handoff and assign a clear owner to every approval. Look for duplicate entries, late material certificates, and programs waiting for review. A skilled machinist may compensate quietly, but personal workarounds are fragile.
During one review, we found operators walking across the shop for gauges several times daily. Relocating the gauges helped, but the original layout had seemed acceptable. That mistake mattered.
Test one change at a time, then compare safety, quality, throughput, and operator feedback.
Standardize Machine Setup, Tooling, and Material Preparation
7 Tips to Optimize Machining Workflow in Manufacturing
Standardize Machine Setup, Tooling, and Material Preparation
Consistency begins before the machine starts. Create one setup sheet for every repeat job. Record fixture locations, clamping torque, work offsets, spindle speed, and feed rates. Add clear photos of the finished setup. Keep the instructions beside the machine. That detail prevents guesswork.
Tooling should follow the same controlled process. Store cutters in labeled locations, separated by diameter and application. Set tool lengths with a measuring device, then verify critical offsets at the machine. Track tool wear after each batch, especially when cutting hard alloys. Replace damaged tools immediately. Small errors multiply quickly.
Material preparation also needs a standard routine. Verify material grade, thickness, heat number, and quantity against the work order. Remove heavy scale, oil, and burrs before loading. Check flatness with a straightedge, since uneven stock can distort clamping. Leave prepared material on a marked rack near the workstation. Our early checklist became too long, so operators ignored it. We reduced it to essential checks and added sign-off fields. That imperfect revision improved compliance, though occasional missed entries still require review. Capture those gaps during daily audits and adjust the process without hiding the problem.
7 Tips to Optimize Machining Workflow in Manufacturing
Standardizing setup procedures, tooling, material preparation, inspection, maintenance, and operator feedback helps reduce avoidable changeover delays and improves process consistency. The chart shows a practical priority score for each workflow improvement area, based on its typical influence on machining efficiency, repeatability, and downtime control.
Optimize Cutting Parameters for Quality and Production Efficiency
Cutting parameters shape both surface quality and production efficiency. Set spindle speed, feed rate, and depth of cut as a coordinated system. High speed may shorten cycle time, but it can raise heat and damage the cutting edge. Start with tooling data, then confirm material hardness, machine rigidity, and workholding stability. Small tests matter.
During setup, machine a sample feature and inspect its surface, dimensions, and chip form. Long, continuous chips often signal poor control or insufficient chip breaking. Reduce speed when heat stains appear. Increase feed carefully when rubbing marks show, but protect thin walls from deflection. Use coolant consistently when the process allows it. Dry cutting is not automatically better. Record each trial, including tool life and inspection results. This record turns operator experience into repeatable knowledge.
Do not chase maximum removal rate. A stable cut usually beats an aggressive one across a full shift. I once treated a clean first part as proof of success; later parts drifted as the tool warmed. That mistake changed our checks. Reinspect after several cycles, not only at startup. Leave a small finishing allowance, then adjust it after measuring actual stock. Even proven settings need review when batches, machines, or materials change.
Integrate Automation, Scheduling, and Real-Time Process Monitoring
A machining workflow improves when automation, scheduling, and live monitoring share one operating rhythm. Map each process before buying equipment. Automate repetitive loading, tool measurement, and inspection tasks. According to the International Federation of Robotics’ World Robotics 2024 report, 541,302 industrial robots were installed worldwide in 2023. That figure signals strong adoption, but automation alone cannot repair poor planning. Keep operators involved. Their practical judgment still catches unusual noise, burrs, and fixture movement.
Build schedules around finite machine capacity, tool life, material availability, and changeover time. Add small buffers for worn inserts or late materials. Perfect schedules often fail on the shop floor. Connect machine data with the planning system, then display simple live indicators: spindle load, cycle time, coolant temperature, tool wear, and first-pass yield. NIST’s smart manufacturing guidance stresses interoperable data and timely decision-making across production systems. Use those principles at cell level. Start with one machine family.
Set alerts for meaningful deviations, not every fluctuation. A rising spindle load can indicate tool wear before a surface defect appears. Review downtime codes daily, but question the codes themselves. Operators may select “other” too often. Compare planned and actual cycle times each week. Record the reason for every schedule change. Use the evidence to adjust routing, staffing, and preventive maintenance. Leave room for reflection. The first dashboard will probably be noisy. That is useful.
Measure Results and Continuously Improve Machining Performance
A machining workflow improves when its results are measured, not guessed. Track cycle time, first-pass yield, tool life, scrap rate, and unplanned downtime. Begin with a reliable baseline from several production shifts. One fast cycle means little if dimensional errors increase.
Keep conditions consistent during comparison. Record material grade, batch size, machine settings, coolant condition, and operator changes. Use inspection data beside machine logs. A stable dashboard can reveal patterns, such as longer cycles after tool changes or defects near the end of a shift. Check the evidence twice. A faulty sensor can create false confidence.
Small experiments usually create safer improvements.
Change one variable, such as cutting speed or toolpath allowance, then compare the results. Protect tolerance, surface finish, and operator safety during every trial. Review performance weekly, and document what worked, failed, or remains uncertain. Our first improvement plan tracked too many indicators and confused the team. Fewer useful measures worked better. Keep questioning the process. Even a successful adjustment may hide higher energy use, excessive tool wear, or quality problems that appear later.
FAQS
Follow one job from drawing release to final inspection. Record setup, cutting, tool changes, waiting, rework, and material movement. Use a simple timestamp sheet. It often reveals delays better than a polished dashboard.
Planned times may ignore tool changes, operator pauses, or inspection queues. Compare several similar parts, not one unusually fast run. Check delays before heat treatment and finishing. These queues may exceed cutting time.
Operators may wait for unclear dimensions, missing tools, or approval decisions. Duplicate entries and late material certificates also create delays. Walk each handoff and assign one clear owner. Small layout problems matter.
Observe operators during normal work. If they repeatedly walk across the shop for gauges, move the gauges closer. Measure the change afterward. The old layout may have seemed acceptable, but it was not efficient.
Treat spindle speed, feed rate, and cutting depth as one system. Check tooling guidance, material hardness, machine rigidity, and workholding stability. Test a sample feature first. Small tests prevent expensive mistakes.
Heat stains may require lower speed. Rubbing marks may require a careful feed increase. Long continuous chips suggest weak chip control. Protect thin walls from deflection. Stable cuts usually outperform aggressive cuts.
Automate repetitive loading, tool measurement, and inspection tasks. Keep operators involved because they notice unusual noise, burrs, and fixture movement. Automation cannot repair poor planning. That part is easy to forget.
Display spindle load, cycle time, coolant temperature, tool wear, and first-pass yield. Set alerts for meaningful changes, not every fluctuation. Rising spindle load may signal tool wear. The first dashboard may be noisy.
Plan around machine capacity, tool life, material availability, and changeover time. Add small buffers for worn inserts and late materials. Compare planned and actual cycle times weekly. Record why each schedule changed.
Reinspect parts after several cycles, not only during startup. Tools warm, materials vary, and operators develop workarounds. Test one change at a time. I once trusted a clean first part too quickly.
Conclusion
This guide explains how to optimize machining workflow in manufacturing by taking a structured, improvement-focused approach. It begins with assessing the current workflow to identify delays, repeated tasks, quality issues, and other process gaps. Standardizing machine setup, tooling, and material preparation can then reduce variation, improve consistency, and make production easier to manage. Clear procedures also help operators work more efficiently while supporting safer and more reliable operations.
The guide also highlights the importance of optimizing cutting parameters to balance quality, tool life, cycle time, and production output. Automation, intelligent scheduling, and real-time process monitoring can further improve workflow visibility and reduce avoidable downtime. Finally, manufacturers should measure results through meaningful indicators such as productivity, scrap rates, setup time, and equipment utilization. By reviewing performance regularly and making data-informed adjustments, teams can build a more efficient, consistent, and continuously improving machining process.
 MecMill Precision
